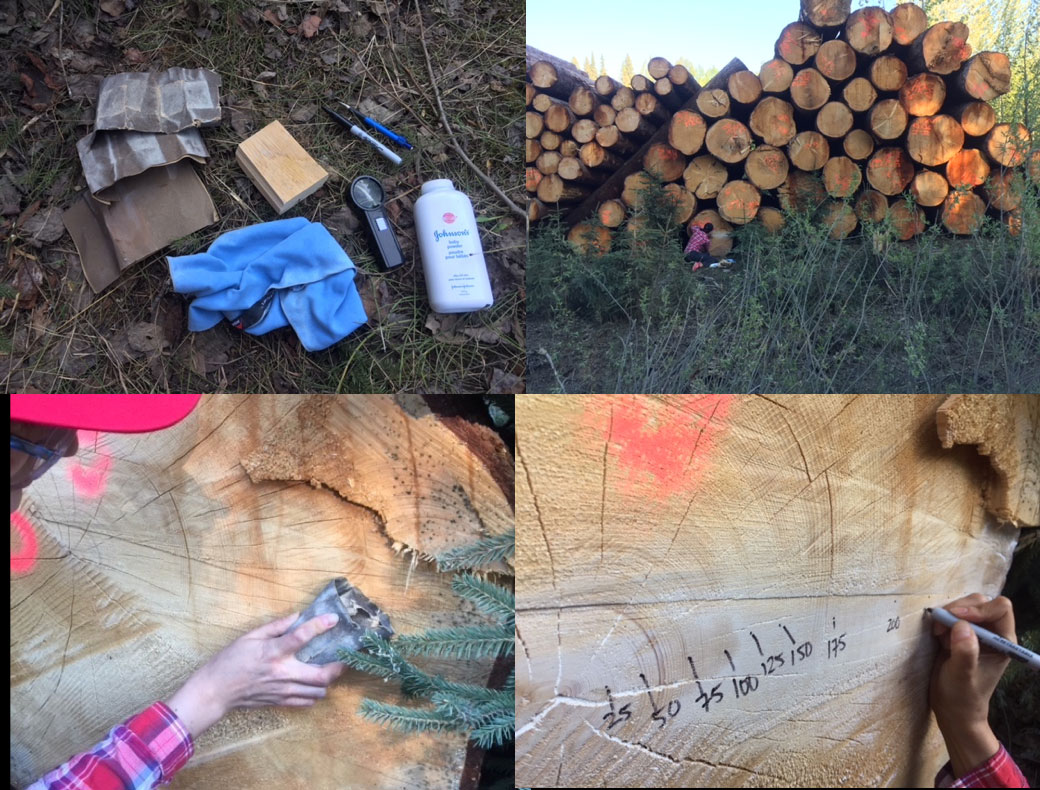
Step 1
You will need:
- a small block of wood that fits your grip
- sandpaper of different grits (rough to fine)
- a magnifying glass
- talcum powder (“baby powder”)
- a small rag or old towel
- a pencil
- a Sharpie
*For keeners – invest in a cordless angle grinder and eye protection for easier and faster sanding*
Step 2
Find a tree with a cut surface. It can be a log or a stump, preferably with some smoothness already, as in the photo above.
Step 3
Wrap the coarsest grit sandpaper around the block of wood, find the smoothest area between the centre of the tree and the edge, and rub the surface from the centre towards the outside edge. Repeat with the finer grit sandpaper as the surface becomes smoother.
Step 4
Rub some talcum powder onto the smooth surface, then rub the powder in with the rag. Sometimes adding spit or water on the powder and rubbing that will make the darker rings clearer.
Step 5
Using the pencil, mark the centre of the tree with a dot. Moving outwards, count the dark rings, marking a dot at every 25-year interval. Use the magnifying glass if necessary. When you’re confident with how you’ve counted the rings, use the Sharpie to mark all of your penciled dots.
Steps 6
Add numbers to your dots. Now you have the age of your tree when it was cut down.